
We waited what seemed like forever to get the ability to use presets in Lightroom Mobile.
With this new collection of Lightroom presets, even MOBILE USERS can now use presets to create gorgeous Light & Airy professional edits from their digital devices. No matter if your photos were taken with a phone or DSLR, your images will look beautiful.
Mobile presets come in a DNG file format. Some sellers allow direct download of the DNG files but some compress the files into a ZIP format.
Note: If your presets are in XMP or lrtemplate format, they are for Lightroom Desktop, not Mobile.
If you see a DNG file when you click on your download link, skip directly to Step 2.
If you see a ZIP file, then you need to unzip the presets first.
Note: If you go into your photo stream and see them as blank picture files, don’t be alarmed – that’s how they should look.
If you don’t have the app, click the appropriate link below to down it to your phone:
OPEN APP LIGHTROOM MOBILE (This step is really easy. Just open your free Lightroom app. Once its open, you can add the DNG/Preset files).
At this point you should have all of your DNG files imported into Lightroom Mobile. Locate the files and open one of them inside the app.
Select the .dng file you saved above in your device. Next, select the DNG presets from your camera roll and import them into your Lightroom Mobile app:

Add file dng to lightroom.
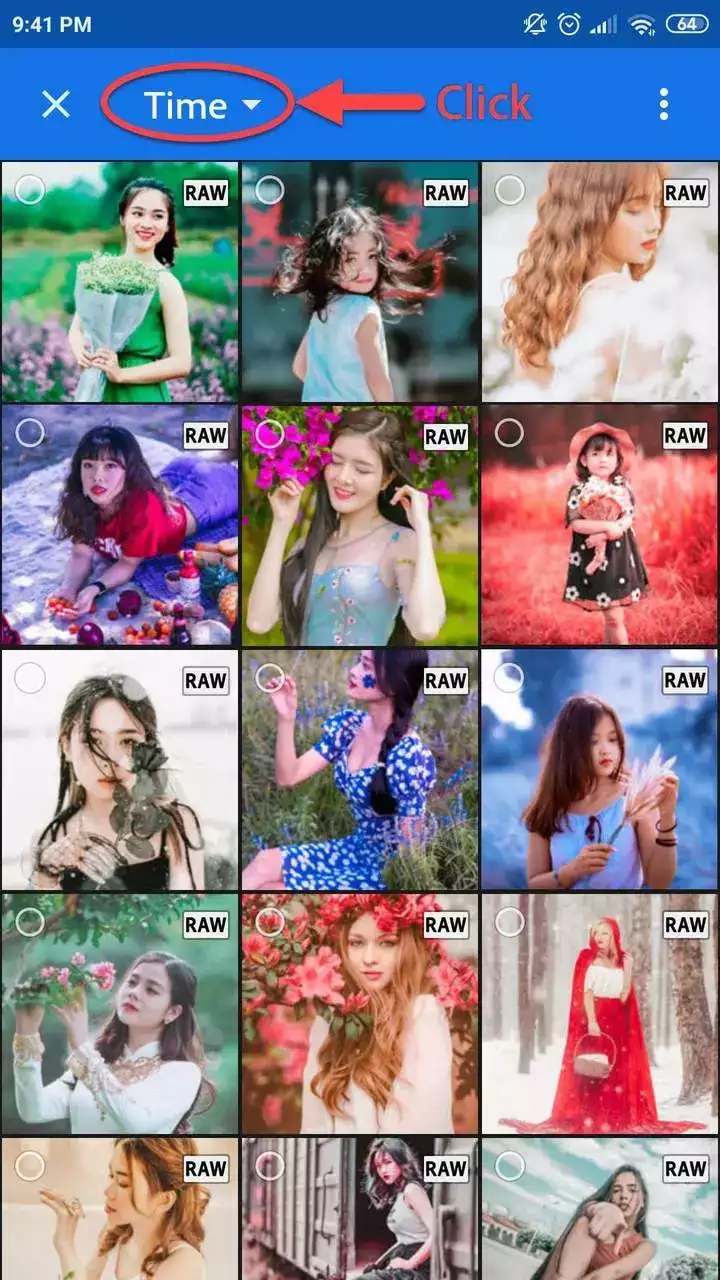
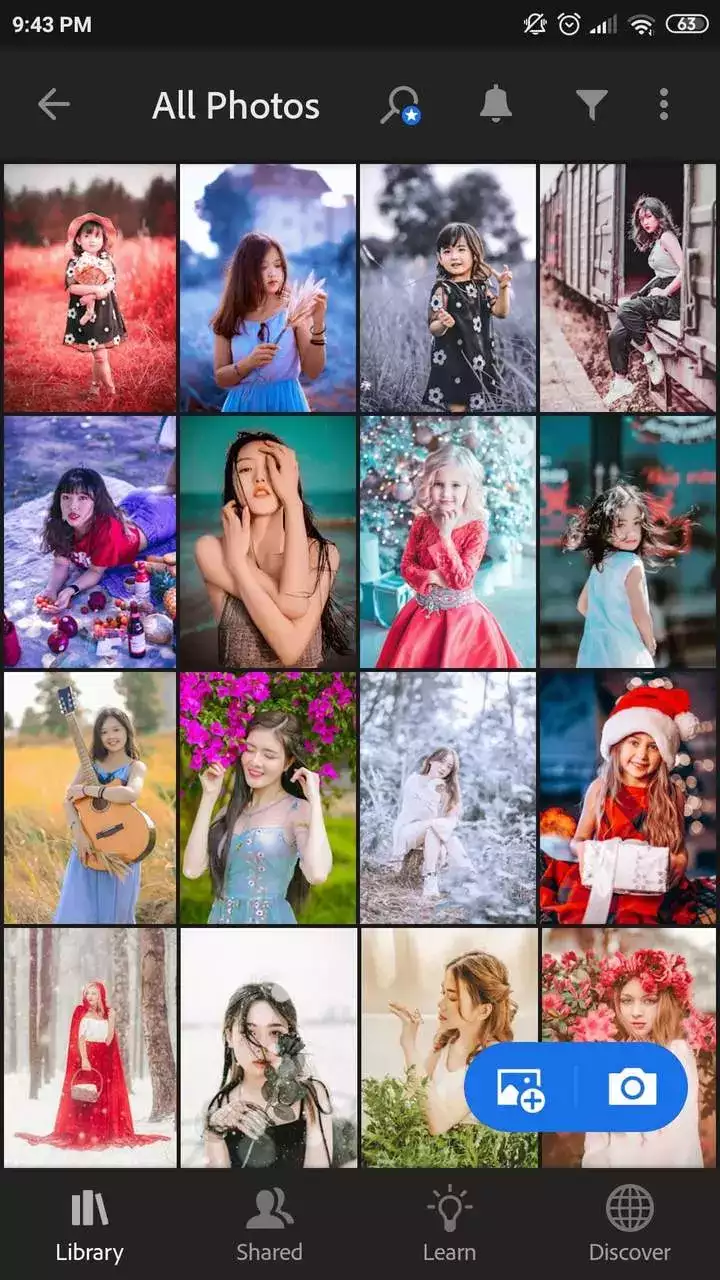
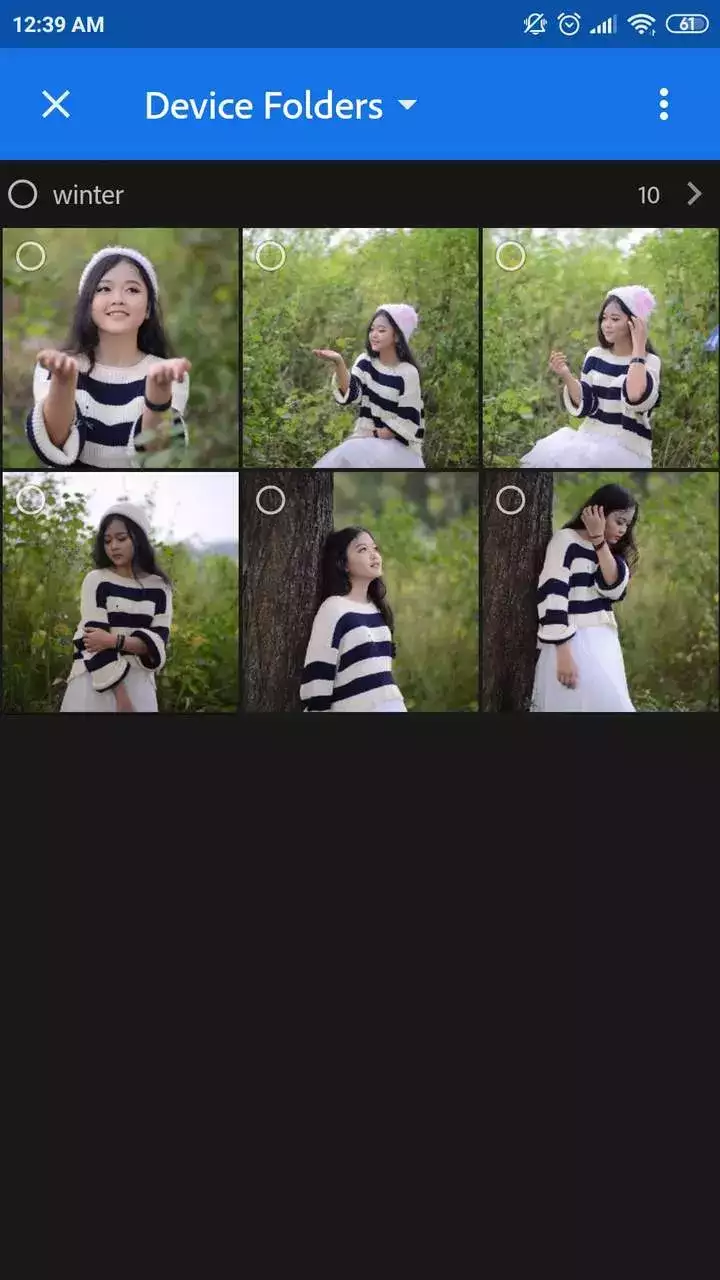
List of image files in the device.
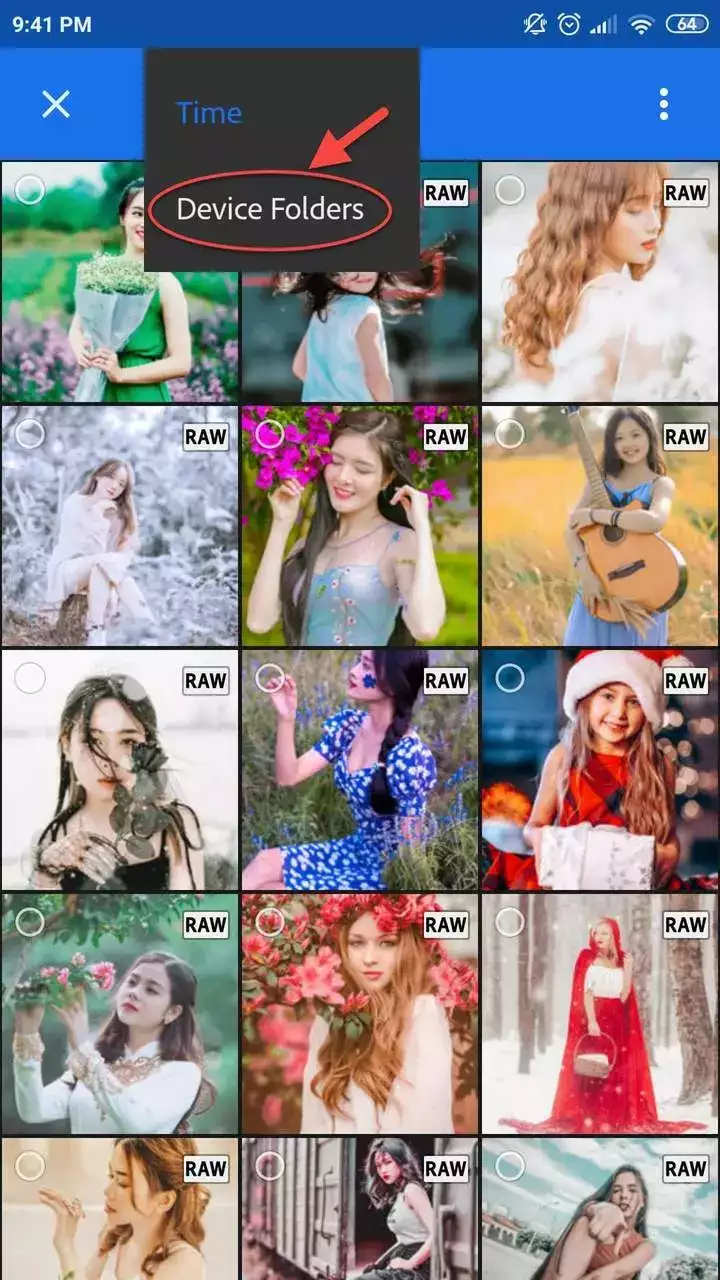
Displays the list by time or selects the folder containing the data files you have saved on the device
Select the directory where the download file is located.

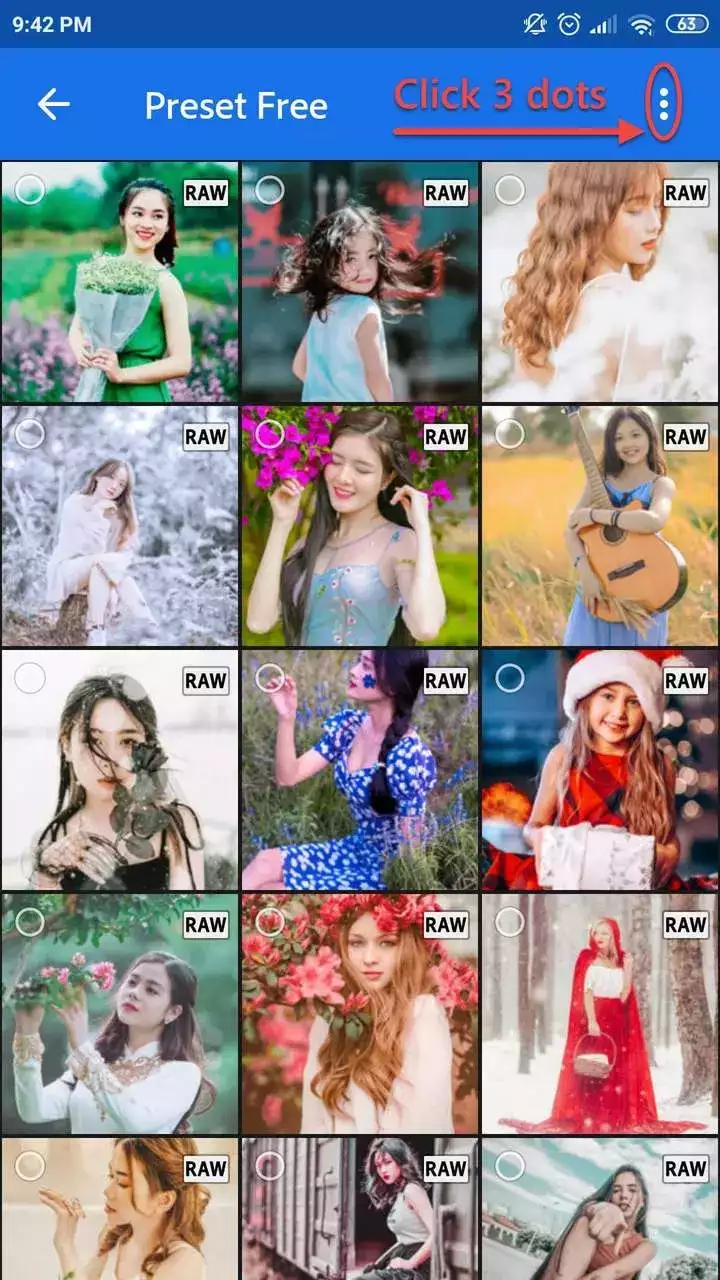
Click the 3-dot icon at the top right of the screen to select the file
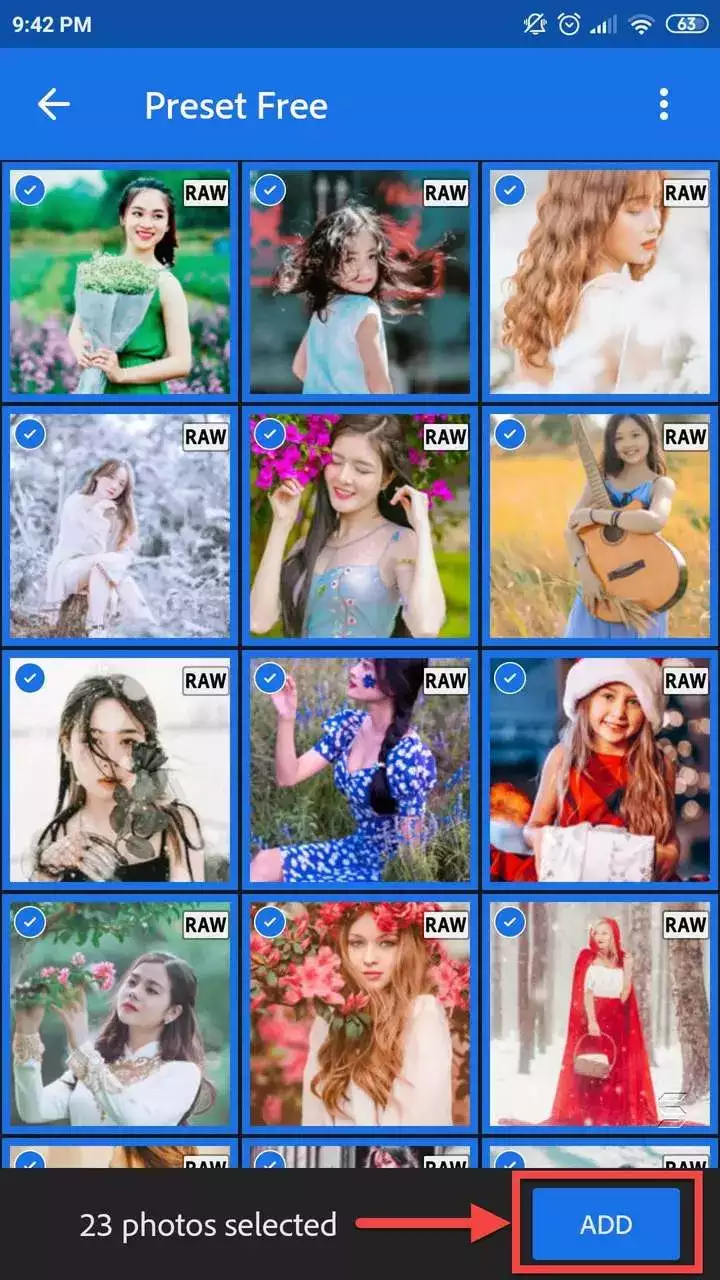
Select 1 or more files or all of the application files you have saved in the folder and click "Add" button.
Wait for a while (depending on the size and number of used files, the load time can be fast or slow) for lightroom to add the files to the list.
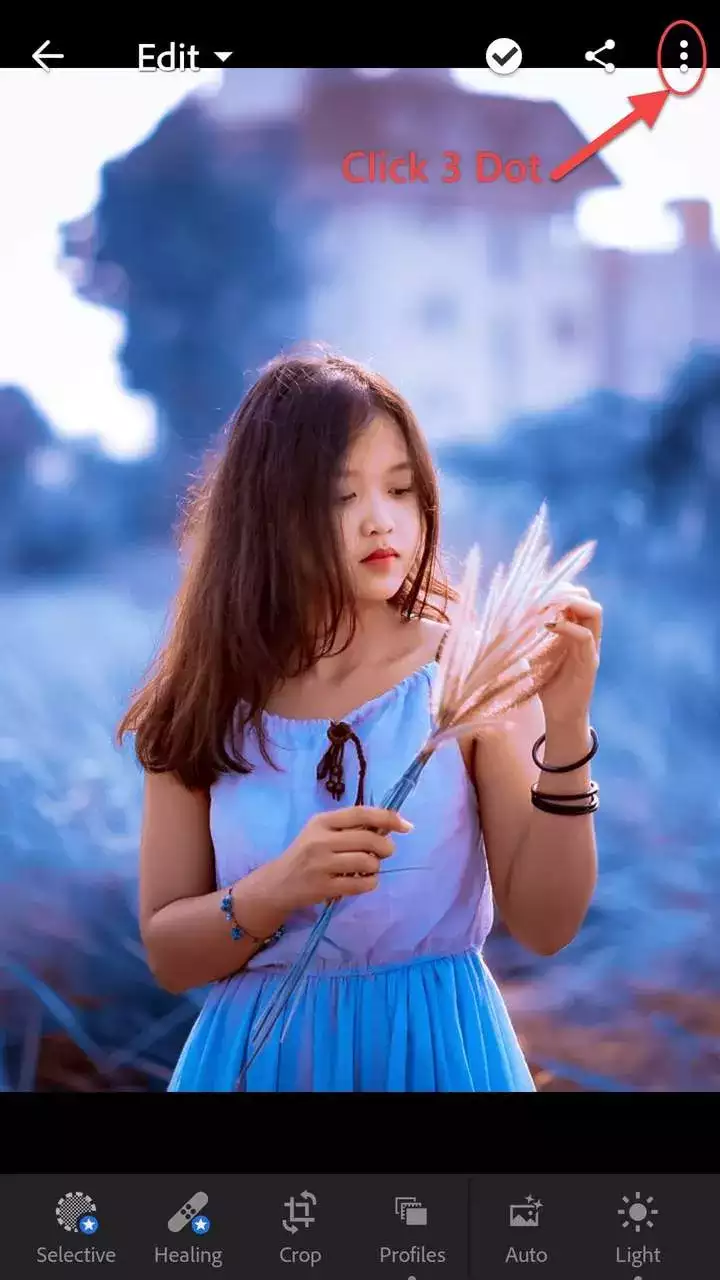
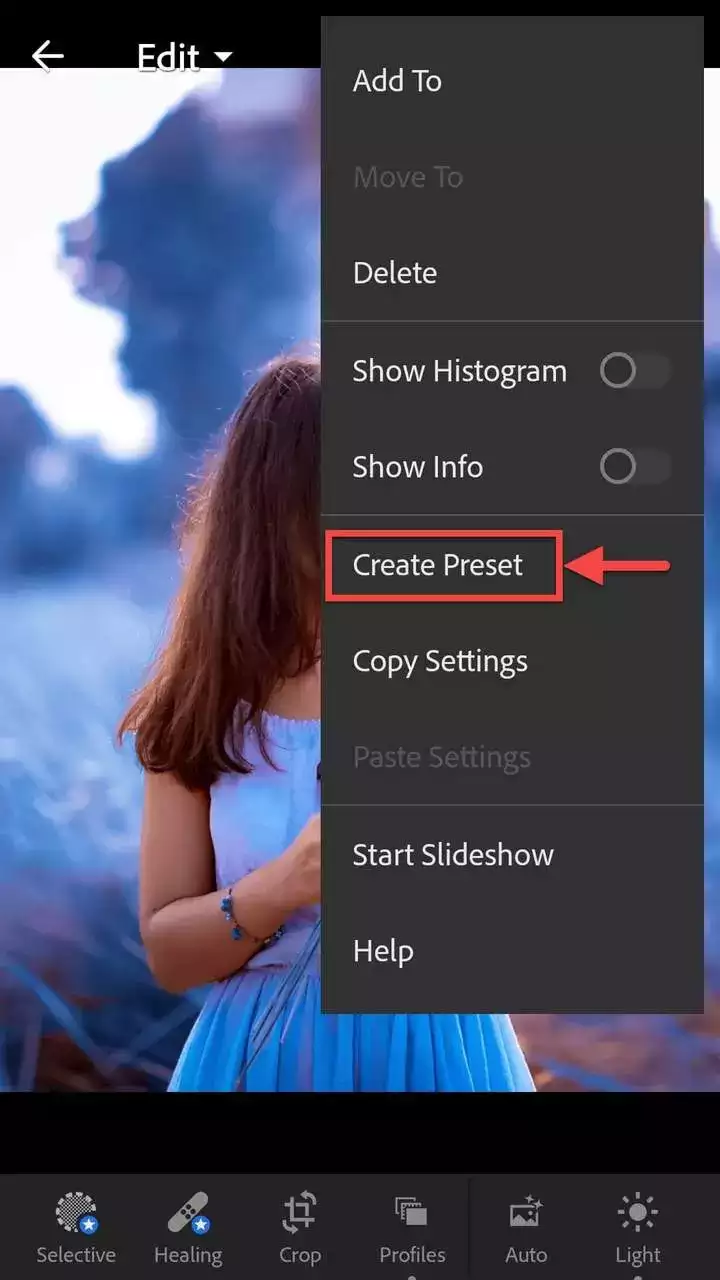
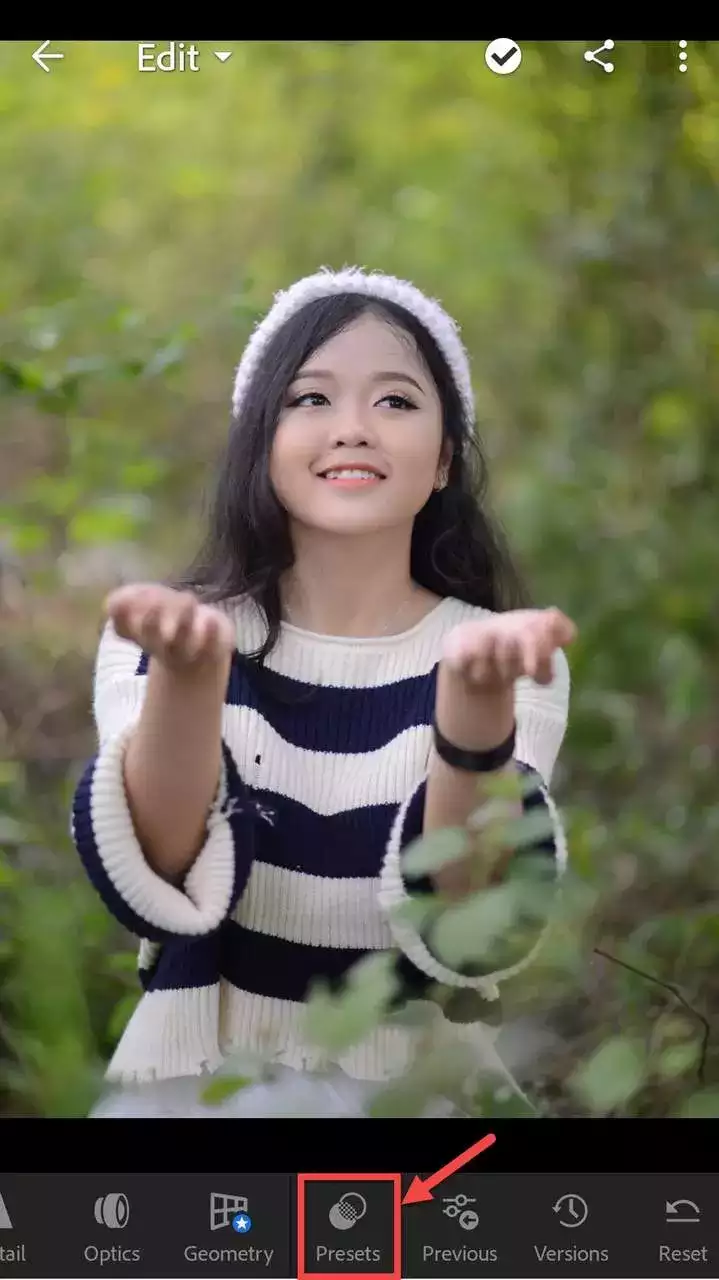
Now tap on the 3 dots icon at the top right of the screen and then tap on Create Preset:
Next you will see the New Preset screen (shown below) which contains all the options you can use to customize your preset. You can give your preset a name (highly recommended) and add it into a Preset Group in Lightroom. We recommend you create preset groups if you have a lot of presets and want to keep them organized.
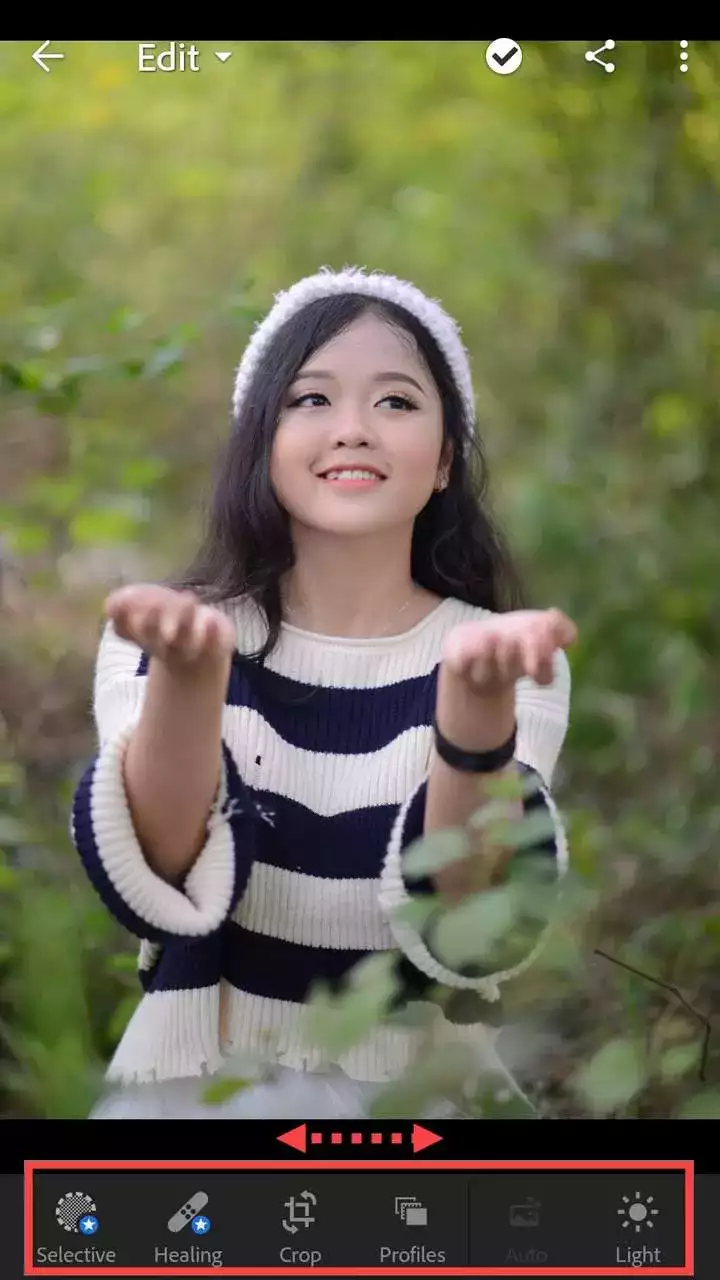
The checkboxes below determine which picture settings you’d like to save with this preset. I personally check all boxes except for Tools, Optics and Geometry. That’s because those parameters vary from picture to picture and I will probably never need to crop or rotate different pictures exactly the same way.
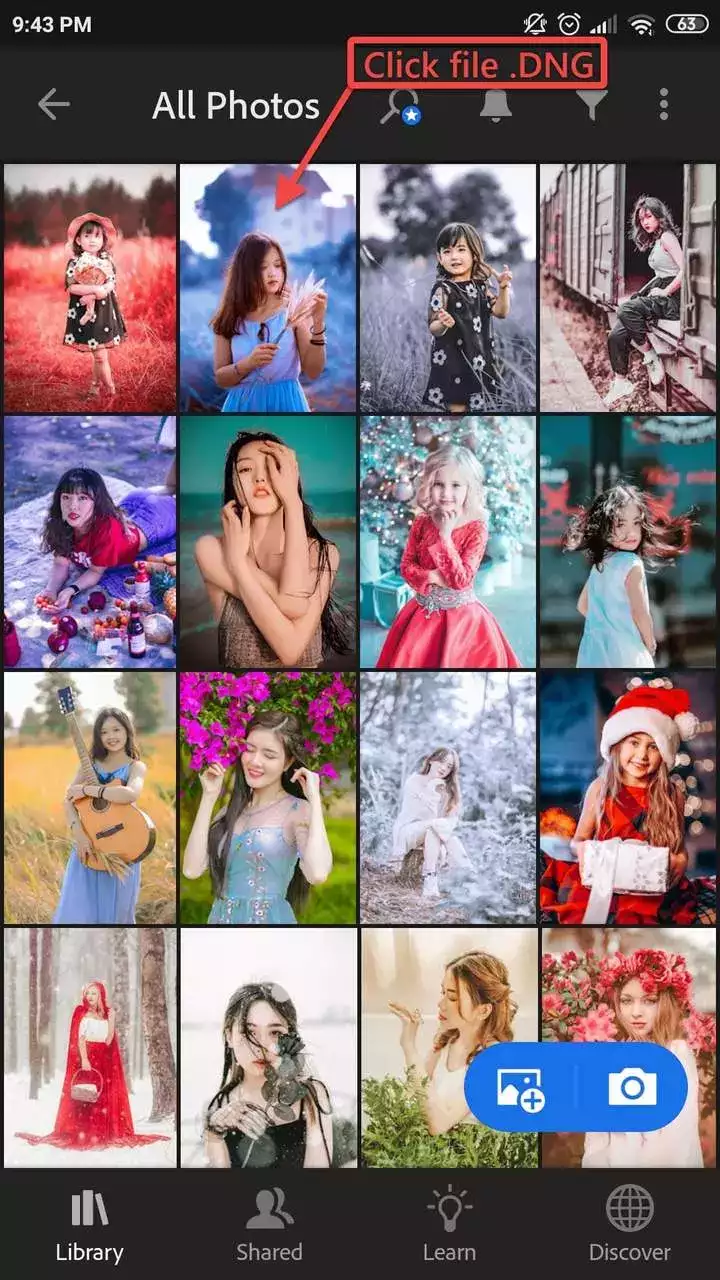
Choose any file .dng to use
Click on any file you have added in the list above. Now tap on the 3 dots icon at the top right of the screen.
Tap on Create Preset.
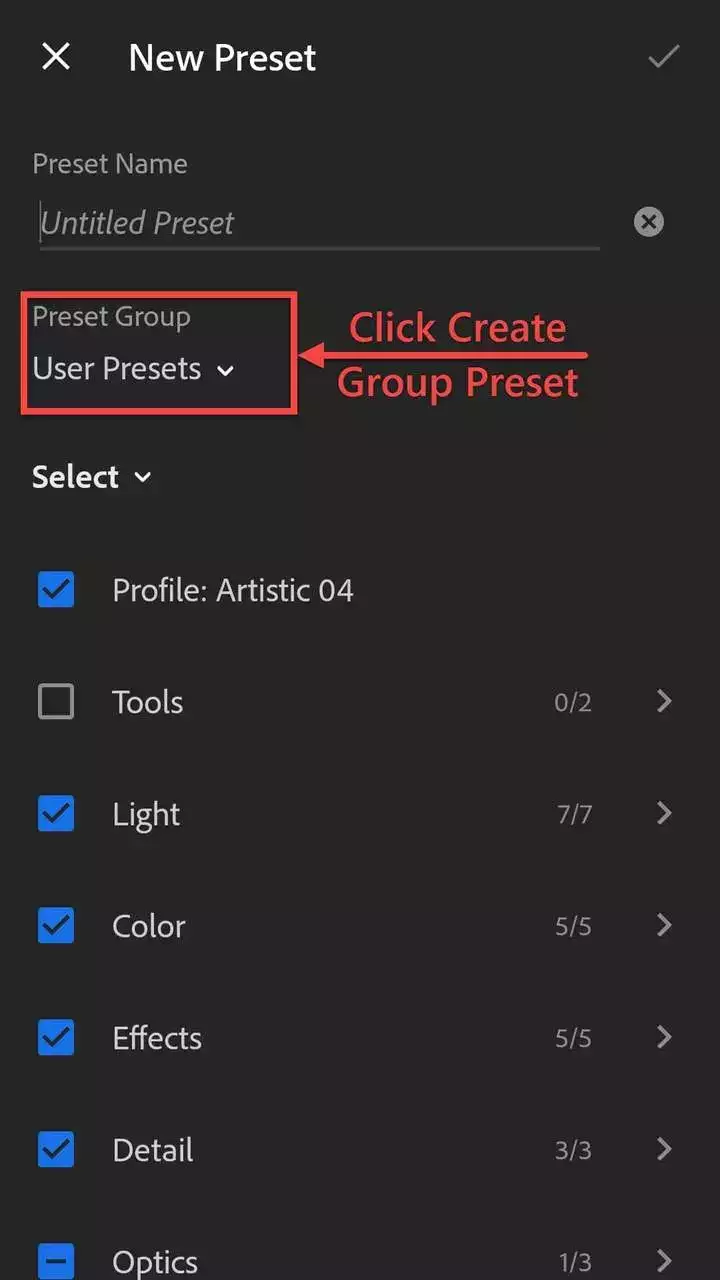
Click the Preset Group to create a Preset group
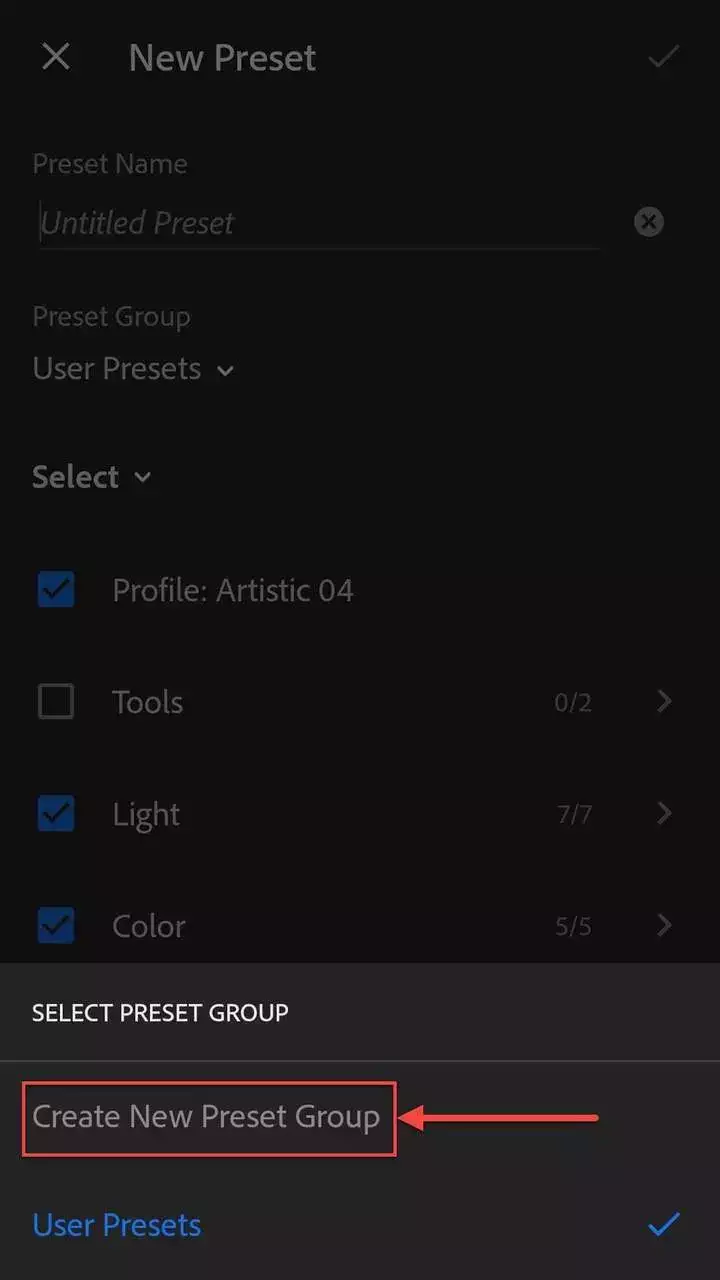
Select "Create new Preset Group"
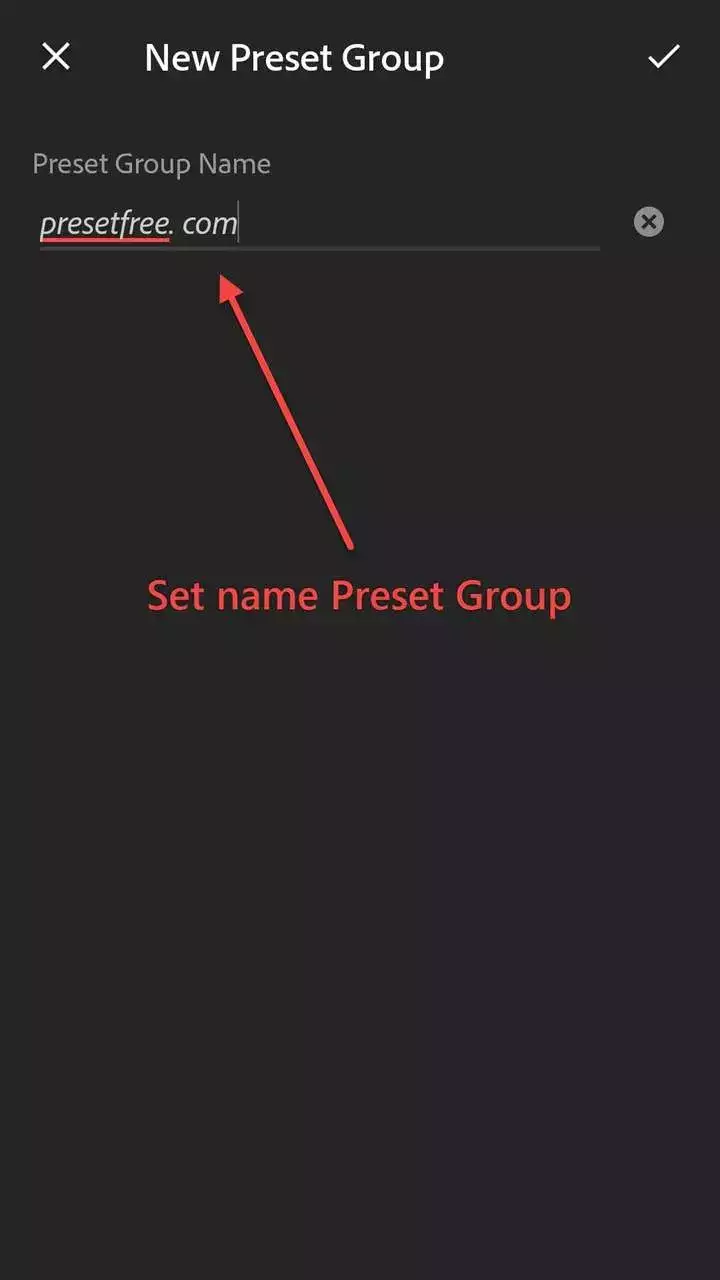
Create a group Preset presetfree.com and save
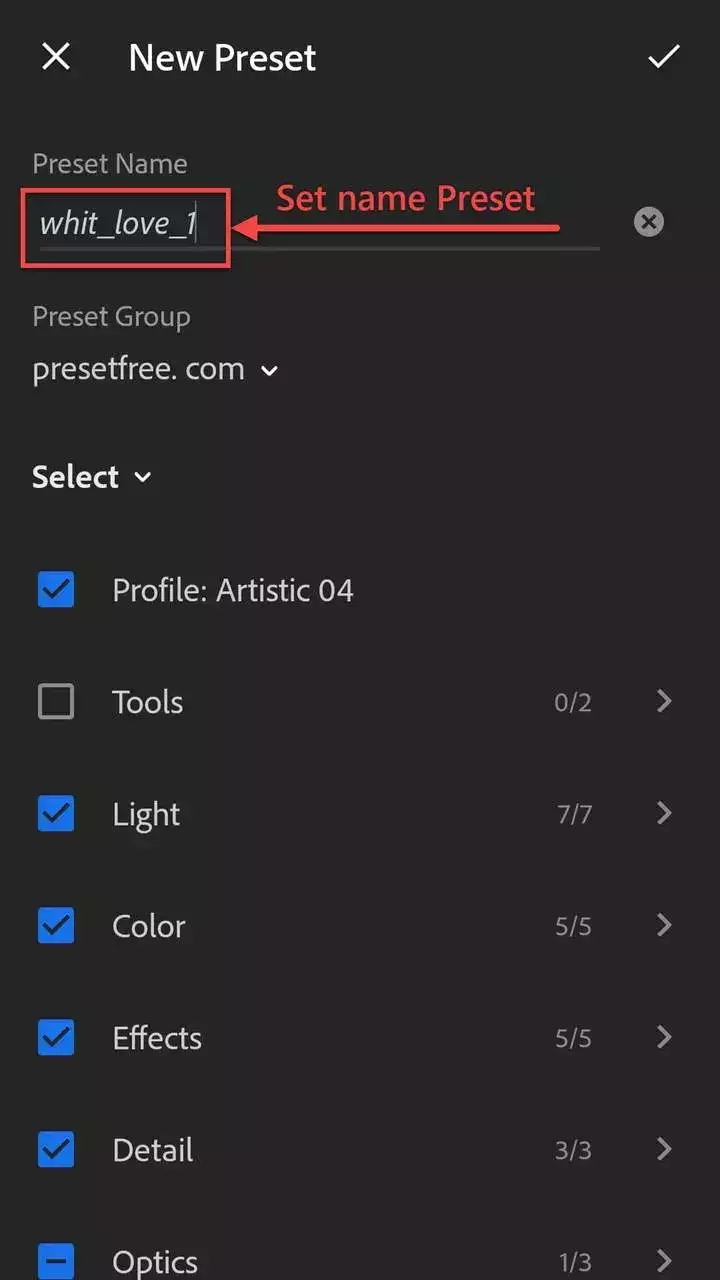
Set name the Preset.
Repeat this step for each DNG file as you will need to save each preset separately. Don’t worry though, you only need to do this once!
To use your new presets just go back into your library and open any photo you’d like to edit.
Find the Presets icon in the menu at the bottom of the screen and tap on it. Make sure the Preset Group that’s selected is the one where you saved your new presets. If you saved them in the User Presets group, select that.
Now you can edit the photo by tapping on a preset from the list and then tapping on the checkmark. You can still continue to edit the photo and make adjustments if you like, after you’ve applied the preset.
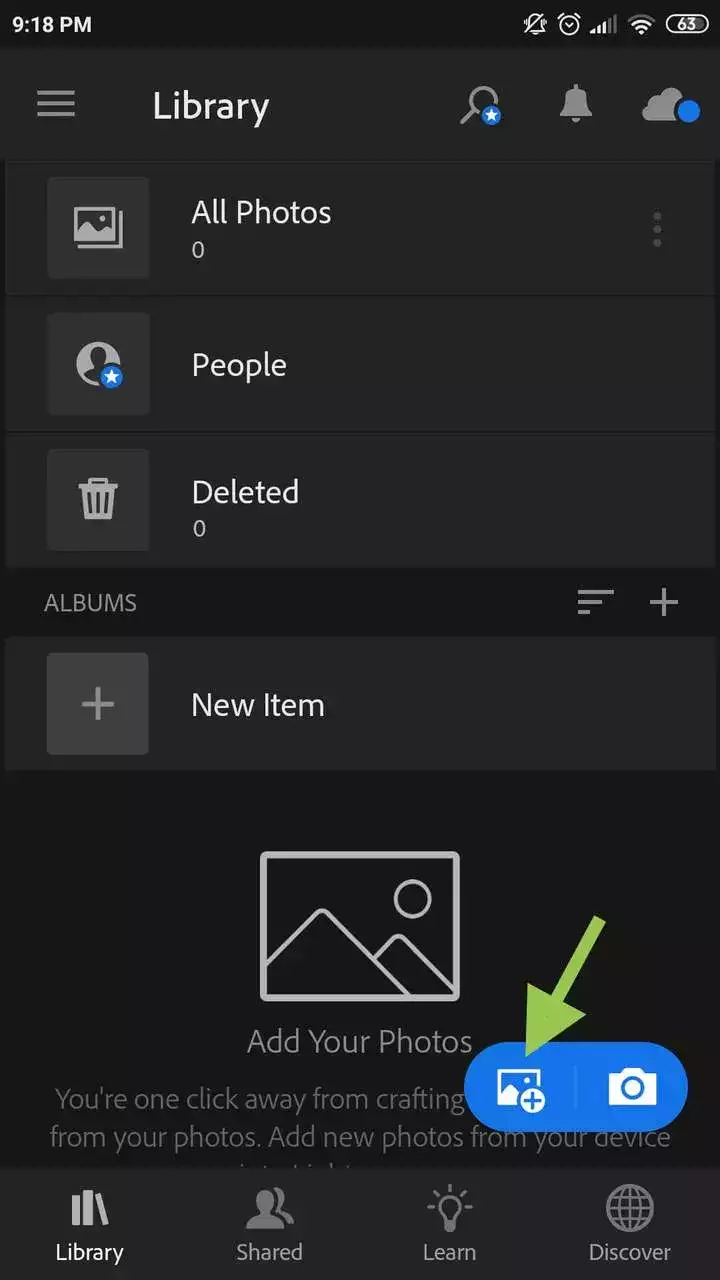
Add photos to edit in lightroom
Select the folder containing the image to be edited and add it to the lightroom
Below you can drag the slider to the preset position.
Click Preset.
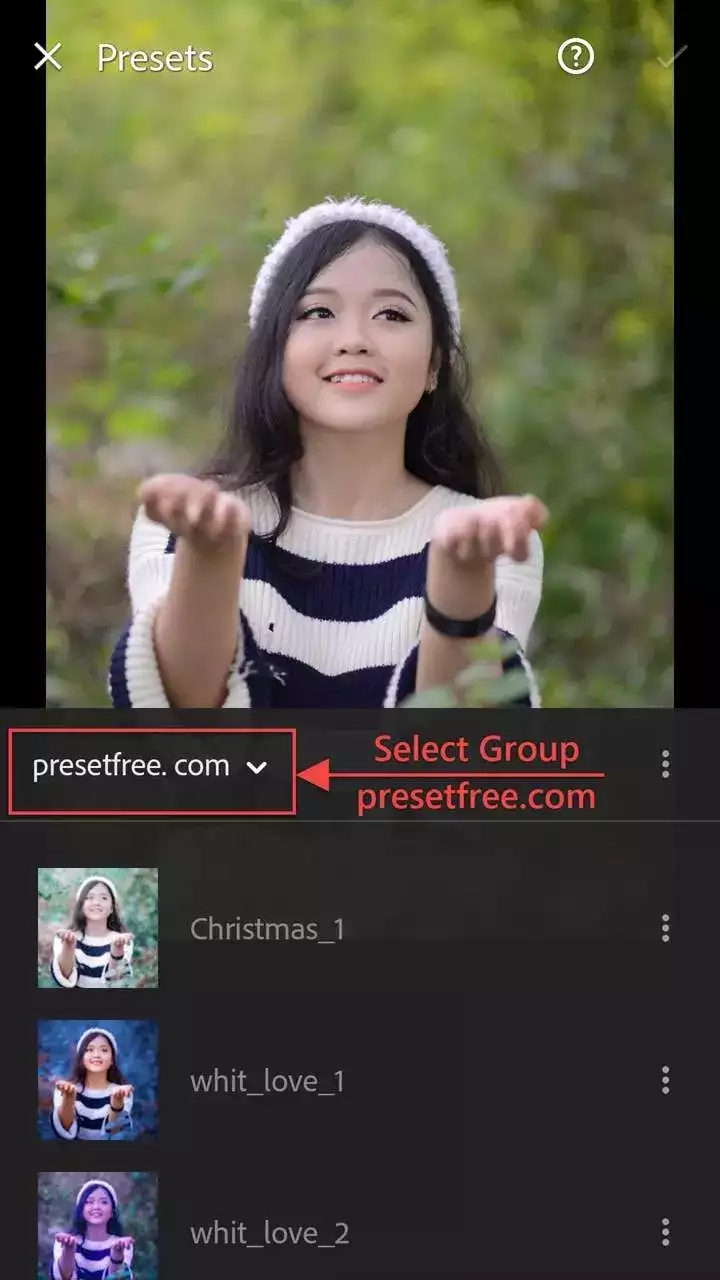
Select the presetfreee.com group group you created in step 4
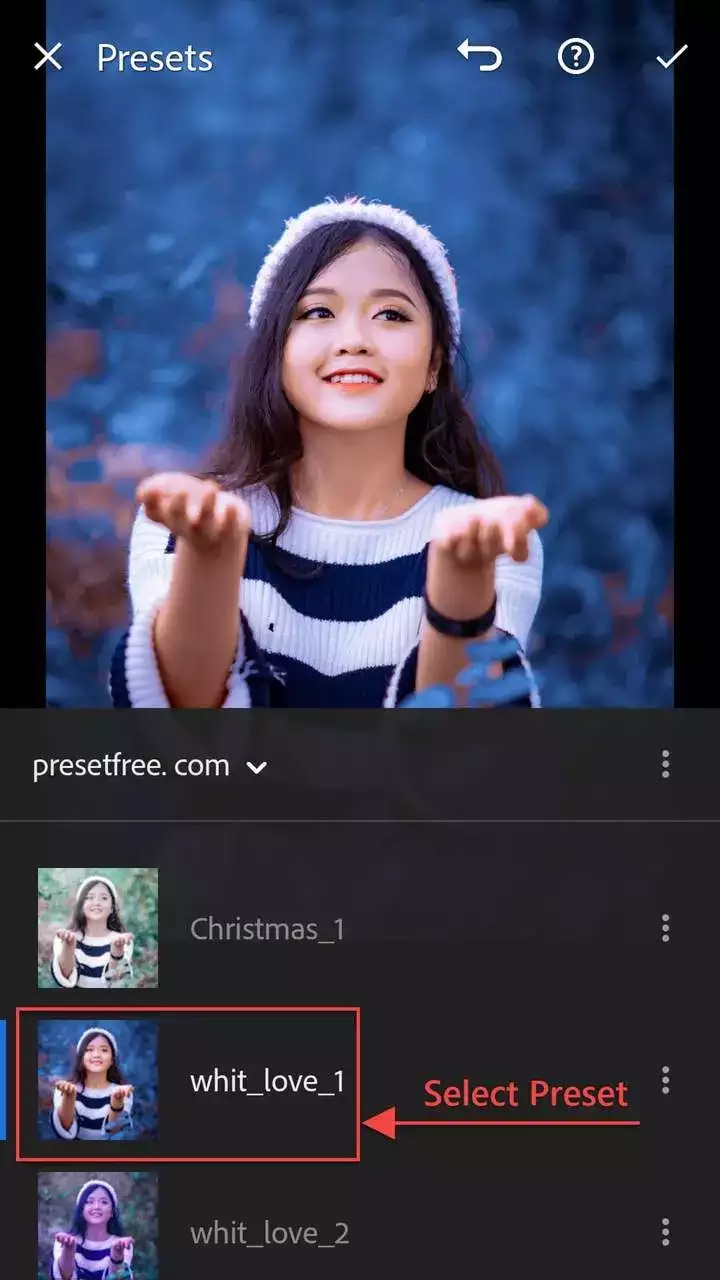
Select the name of the preset that you created above to apply to the photo you want to edit. Then save them.
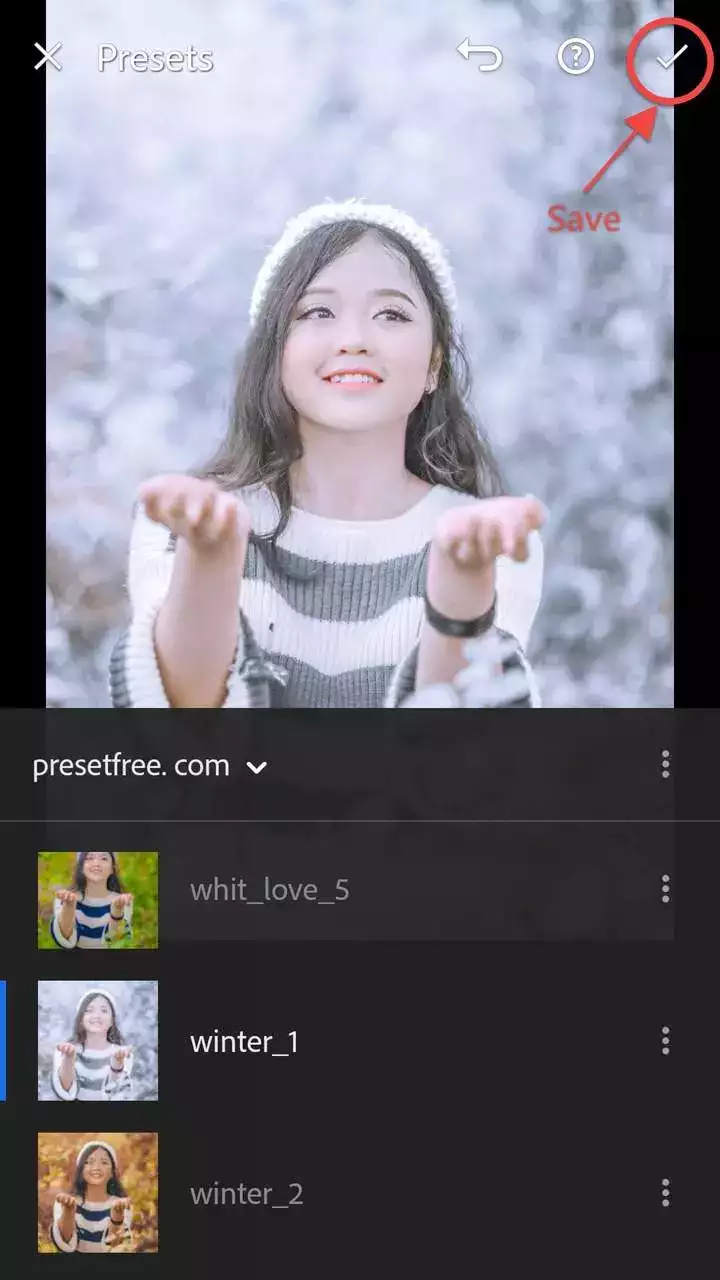
Select the appropriate Preset and save your edits
And that’s it! Now you know how to install, save and use your Lightroom Mobile presets without desktop! Enjoy! Editing photos and getting beautiful results is so inspiring. We'd love you to share your edits in our Free Presets for Lightroom! Let us know if you have any questions or issues below :))